After buying and testing three bikes, namely a BMW F650GS – BMW R100GS and SUZUKI 650V-

MODIFICATIONS
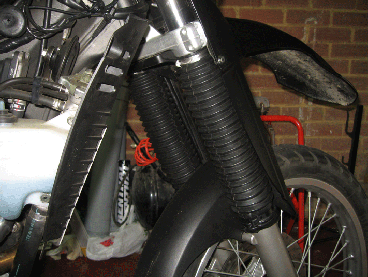
FORKS
Remove the forks and strip down, replace the fork seals and reassemble having fitted spacers internally to give more spring preloaded Check and repack the head
bearings reassemble the front end fitting fork gaiters.
WHEELS
Remove the tyres and carry out enduro mods ie five layers of gaffa tape in the rims and elongate the
valve holes.
Fit Michelin heavy duty tubes and Tourance tyres.
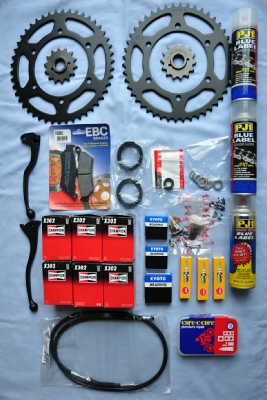
CHAIN AND SPROCKETS
We decided on Tsubaki for the chain on the advice from B&C EXPRESS as the Tsubaki equivalent of a DID heavy duty X ring is not only cheaper but also heavier duty. We have different gearing for off road but are able to use a standard length 520/1100 chain.
The sprockets are steel and for road we have 15/45, for off road 14/46.
14/46 is the lowest you can go on the XT without needing a longer chain . Also 15 is the biggest front sprocket you can fit without fouling casings etc
Also carried is two spare links.
EXHAUST
Remove the standard pair of exhausts with Cat and replace with a Metal Mule single can system (no Cat). This system also greatly improves ground clearance.
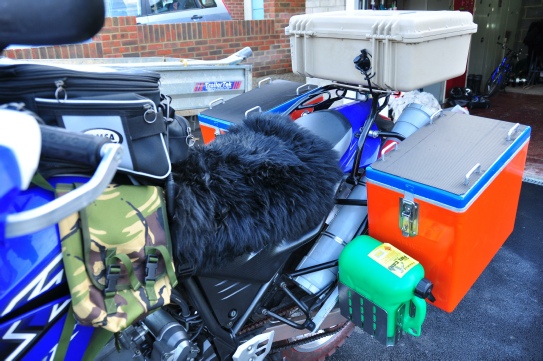
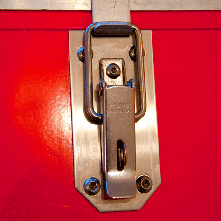
PANNIERS
We wanted metal mule frames and panniers but couldn’t afford them so we sourced Touratec racks and boxes off ebay.
We found the standard box catches to be cheap and flimsy so we mounted new heavy duty stainless steel catches on to stainless steel plates. We had the boxes powder coated but anodising would have been better. We also replaced all the rack bolts with ss nylocks.
PIPE CARRIER
Fabricate and fit a pipe carrier to replace the left side exhaust can.
This carrier holds 2 x 2l coke bottles for water or 2 x 1.5l fuel bottles.

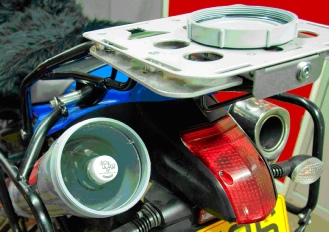
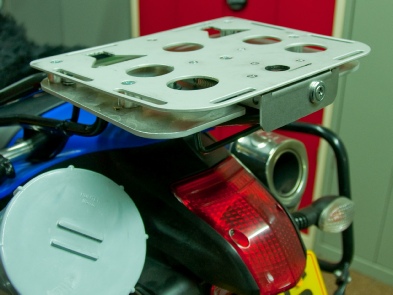
REAR TOP BOX
Paul’s bike has a standard Yamaha rear rack, on it fits a 1550 Peli case mounted on a Touratec lockable quick release plate.
In the Peli case is a powerlet charging system to charge the lap top via a Kensington Air/Sea/Auto lead..
We also have a multi charger to charge camera – AA – AAA Rechargeable batteries.
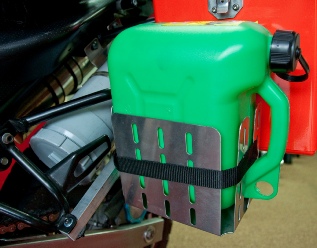
FUEL CARRIER
Paul’s bike has a specially fabricated fuel carrier fixed to the left side pillion foot peg hanger. It safely carries a 5L fuel can.
ELECTRICAL
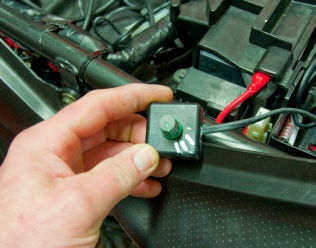
Centech AP1 Aux fuse box that has a switched supply so all ancillary components are individually fused and switch off when the ignition is turned off.
Heavy duty high crank batteries fitted.
We rerouted many cables to prevent chaffing and all electrical connections were cleaned with contact cleaner and sealed with Dielectric grease.

FUEL MOD
We fitted a modification to enable us to easily adjust the mixture to cope with low grade fuel and altitude. See the KEV MOD on the XT660 Forum.
After market fitments
PIAA 140db air horns
Renthal high Enduro bars
Barkbuster hand guards
High screens, Paul’s has an extension made from an old visor.
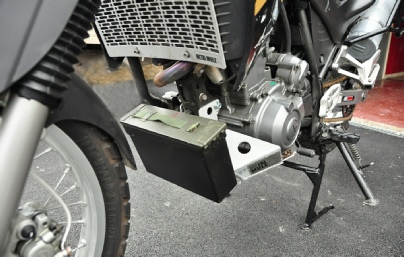
Metal Mule bash plate and Rad guards
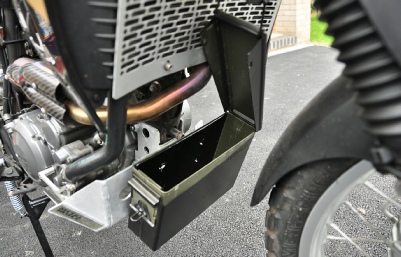
Army ammo box fitted to the bash plate as a tool box
Oxford heated grips
Autocom Kenwood bike to bike system
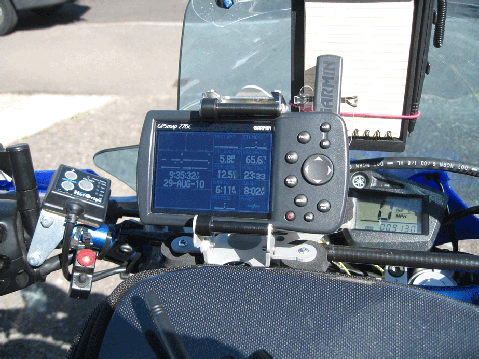
Garmin 276c GPS on Touratec lockable mount
Handle bar camera/video mount
Centre stand
Famsa tank bags
Home made sheep skin seat covers
Braided brake lines
Bottle rack fitted to one pannier each.
SERVICE PARTS IN THE TOOL BOXES.
6 x Oil filters
3 x spark plugs
1 x gasket set
1x fork seal kit
1 x wheel bearing set
1 x set brake pads
1 x set cables
1 x set levers
2 x sets std inner tubes
K&N oil
Bulbs and fuses
1 x Regulator rectifier
Araldite
Loctite
Metal putty
Copper grease
Small LM Grease
Solder and Gas
Insulating tape
Gaffa tape
Cable ties
Misc nuts and bolts
Heat shrinks
Cable
Instant gasket
Super glue
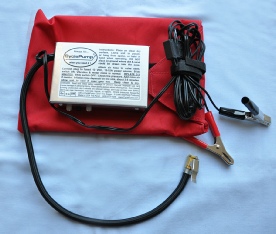
Bike jump leads
Puncture repair kit x 2
Note: These are just the main modifications, lots more have been done but not really worth a mention.
We opted not to fit large fuel tanks, mainly due to the cost of 900euros per bike. Our normal fuel capacity would be 15L in the tank – 5L in Paul’s fuel can – 1L each in the bottle carriers. That gives us a range of 300 miles each. Our maximum capacity if needed would be as above but with an additional; 4L each in the pipe carriers and a 5L can bungeed to Angie’s bike. Giving us a range of just over 400 miles each. We only expect to need this range in OZ
We both have small tail packs fitted to our pillion seats that carry a 10L Ortlieb water bladder plus our days food shopping etc.
Angie has an Ortlieb bag strapped across the rear of her bike which carries the tent, sleeping bags etc.
We have an Army gas mask style bag slung around the tank bags with a 1.5L Camelbak inside.
We both have an MP3 player that works nicely through the Autocom.
That’s how we intend to leave. We are sure to change things as we go – once we get into a routine will we know for sure.
For full size images of bike prep click here


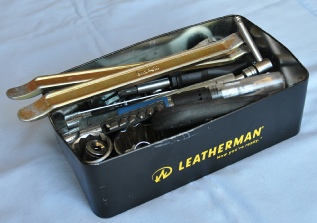
Firstly I have some explaining to do; just in case somebody makes a mistake and thinks that I know what I am doing!! I simply got myself a small tin on my work bench in the garage and each time I worked on the bikes I put the tools I used in the tin – I made sure I only used tools from the tin and If the tool wasn’t in the tin then I needed to buy it. As a result I have a tool tin that weighs in at 3kgs.
I know that it’s over kill but split between two bikes it’s not so bad. Trouble is that having been a builder for ever, I strongly believe in sods law – with a van full of tools – the one you sodding need is always at home! At least by taking all my tools I know what I can do before I start needing to look for help.
SOCKETS
32mm ½ inch drive for front sprocket (cut down as only shallow nut)
27mm ½ inch drive for head bearings (cut down)
14/13/12/10/8mm ¼ inch drive
ALLEN SOCKETS -
Rear spindle spanners OE tool kit
Compact screw driver and bits
FEELER GAUGES -
Digital pressure gauge
3mm pin punch for brake pads (cut down)
Tele pen magnate (I have butter fingers)
TYRE LEVERS X2 -
Mini hack saw
100mm Engineers steel ruler
We have gone against the grain and not fitted scott oilers – firstly because I’ve never liked them but mainly because for years I have used PJ1 Blue Label chain lube and found it to be fantastic

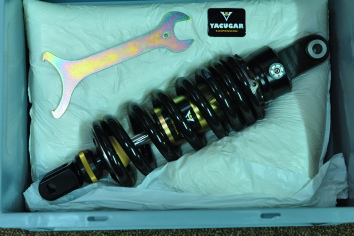
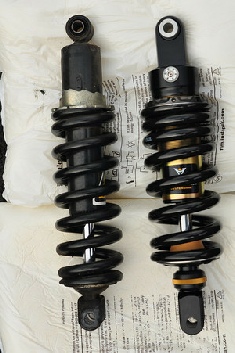
At first we thought the cost to replace the rear shocks would be prohibitive so instead we planned to re-